Hello there peeps
I have been working a few tutorials.
First up
How to mend a tear
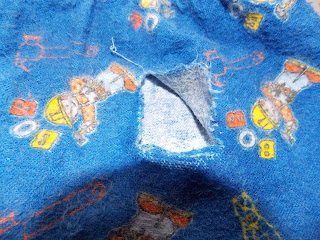
These are my boys fave pj's so needed a little attention!
Here goes!!
What you'll need
~ A item with a hole (of course!!)
~ Scissors OR Pinking shears
~ Scrap of fabric (to cover said hole)
~ Thread
~ Pins
OK have you got your supplies... Yes, well lets go!
Here we have said fave pj's!!
Press closed...
Now, cut your scrap, say 5/8ths bigger. I used Pinking shears, but you can just use a zig-zag stitch to save your scrap from fraying. There is also a this magic stuff called Fray stop, I have never used it but I have heard rave reviews..
Now, with the right side facing you pin said rip or tear...
Turn your ripped or torn clothing to the wrong side, and pin like so. I have the pins like this over the seams, if you like you can sew over them without any bother....
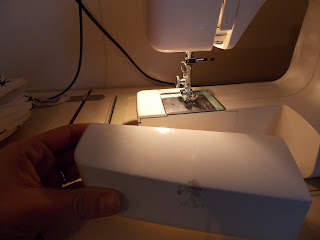
Now go to your machine, remover the front. Like so....
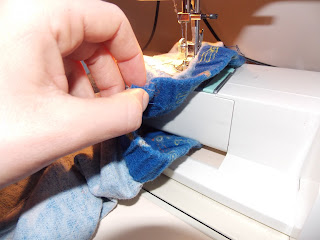
With the front removed you have more space. Now place your item under you needle of your machine tucking underneath....
You should look like this.... Start sewing towards the next corner at 1/4 inch, taking care of the pins you put in the right side!
When you get to the corner, raise your foot and turn. Do this till you get all sides done....
Now, you need to go over the first corner and do a back stitch to hold....
Take out your pins, you should look like this....
Turn right side, remover pins...
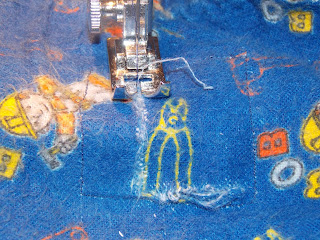
Place your item under the foot, over the tear or rip.... NOW, you want to do a straight stitch here for about sat 3-4 stitches. Then do your zig-zag. This will prevent the zig-zag stitch falling out...
I went over mines twice, as the bottom part of my tear was wide. This is for you to judge!!
This is my wrong side.... I could have done with a little more scrap at the bottom, it's better to have to much. You can cut it off then!!
That being said I do now have a very happy wee boy....
So there we have it...
TAH~DAH...
Fave pj's sorted.
I hope you've enjoyed my first proper tutorial!!
Let me know in the comments!!
***********
FYI
This is the zig-zag stitch with the straight stitch for a visual!!
Till the next post...
XoXoXoXoXoXoXoXoXoXoX


Neatly done!
ReplyDeleteThanx so much! My wee boy is very happy. It's the simple things!
DeleteAppreciated the tip about straight stitch at beginning and end of zig zag. THAT is where I usually use the Fray Stop..now, I won't need to. :)
Delete~Louise
My sewing teacher taught me that trick.... Defo works, it's just remembering it!! :)
DeleteI have just got the same tear to a favorite duvet cover and I was wondering what I could do to it, and now I know! Thankyou so much you have saved my life with a very distressed little boy and his matching room to duvet cover.
ReplyDeleteSo glad to be able to help! Like I say there's nothing worse than the little'uns faves being torn, etc! :)
DeleteI have that problem with a comforter... the top layer has a tear, just like those pajamas. How to fix that? Sew through all the layers??
ReplyDeleteOnly thing i know to do with that is to use the iron on patch big enough to fit, inside the hole with the sticky side up, stretch the material over the patch, then iron it in place.
DeleteHello Pam, I would rip out the seam edge, then follow the tutorial on your tear. Then sew the seam leaving open a say 3 inch space. then do a ladder stitch. I hope this helps. Email me a pic and I can walk you through it. There's nothing worse than a child fave thing going kaput!!! :)
ReplyDelete